
Wintersweet Tutorial: Part One...
- Nicola

- Sep 22, 2018
- 4 min read
Updated: Feb 27, 2020
Do you ever see fabric and think ‘I really must make something with that’? Silly question, you’re quilters, so of course you do. Well, a mere glimpse of Joanna Figueroa’s Christmas Figs and I started sketching.
The design I was drawn to is an old one, the Irish Chain, which alternates plain and nine-patch blocks. I love Irish Chain quilts, they manage to be homely and elegant at the same time with a lovely balance between pieced blocks and negative space. The earliest examples date from the end of the C18, so there are endless variations on the theme and lots of vintage examples to inspire us.
My quilt was inspired by a mid C19th quilt in the Mingei Collection which has unusual colour placement in some of the nine patch blocks.

I mixed my simple, strip-pieced nine-patches with four-patch blocks to extend the diagonal 'chains' and create garlands of ivy greens. The red prints have been used in the 'cross' motif to suggest holly berries. Mixing prints within each block gives the finished quilt a wonderfully vintage feel which will only get better over time.

To make a 74” x 74” finished quilt you will need...
1 Jelly Roll* of Christmas Figs by Joanna Figueroa for Moda
½ yd or 2 Fat Quarters of green prints {mine were from my considerable Fig Tree stash}
4 yds neutral fabric for border blocks {I used Bella Solid in Porcelain}
4¾ yds fabric for backing
82” x 82” Cotton Batting
¾ yd fabric for binding
*A NOTE ABOUT FABRIC: You will be cutting your jelly roll strips in half, so if you have some red and green fat quarters in your stash you could cut 2½” x 21" strips from those.
Please read through the pattern before you begin, assuming a ¼” seam allowance and a fabric width (WOF) of 42”. I would always recommend making a test block.
CUTTING...
1. Choose 6 red & 17 green Jelly Roll strips and cut 2 2½” x 21” pieces from each. Cut any additional green strips you may need from the green Fat Quarters.
2. From your neutral** fabric cut 19 4½” x WOF strips and subcut into 112 4½” x 6½” pieces, then cut 23 2½” x WOF strips and subcut 46 2½” x 21” pieces.
3. From your binding fabric cut 8 2½” x WOF strips. If you like a scrappy binding you could use the remaining red prints from the Jelly Roll.
** I replaced a few of my 2½” strips with the cream prints from my Jelly Roll to give my quilt a scrappy, vintage look.
PIECING THE STRIP SETS...
4. Strip-set A: Join a 2½” x 21” green strip to a 2½” x 21” neutral strip, pressing towards the green strip and taking care to keep your sets straight.

MAKE 16 then subcut into 128 2½” sections.
5. Strip-set B: Join a 2½” x 21” green print strip – varying the prints - to each side of a 2½” x 21” neutral strip, pressing towards the green and taking care to keep your sets straight.

MAKE 7 then subcut into 50 2½” sections.
6. Strip-set C: Join a 2½” x 21” neutral strip to each side of a 2½” x 21” green strip, pressing towards the green and taking care to keep your sets straight.

MAKE 4 then subcut into 25 2½” sections.
7. Strip-set D: Join a 2½” x 21” red print strip – varying the prints - to each side of a 2½” x 21” neutral strip, pressing towards the red and taking care to keep your sets straight.

MAKE 3 then subcut into 24 2½” sections.
8. Strip-set E: Join a 2½” x 21" neutral strip to each side of a 2½” x 21" red strip, pressing towards the red and taking care to keep your sets straight.

MAKE 6 then subcut into 48 2½” sections.
ASSEMBLING THE FOUR-PATCH BLOCK...

9. Make the four-patch units by joining 2 2½” sections of strip-set A, mixing the prints, as shown right, pressing your seam to the side, or open if preferred. MAKE 64
ASSEMBLING THE GREEN NINE-PATCH BLOCK...

10. Make the nine-patch units by joining a 2½” section of strip-set B to each side of a 2½” section of strip-set C, again mixing the prints, as shown left. Nest the seams and press in the direction of the arrows.
MAKE 25
ASSEMBLING THE RED NINE-PATCH BLOCK...

11. Make the nine-patch units by joining a 2½” section of strip-set E to each side of a 2½” section of strip-set D, mixing the prints as before, as shown right. Nest the seams and press in the direction of the arrows.
MAKE 24

ASSEMBLING THE QUILT...
12. Lay out your quilt blocks, as shown below, alternating the pieced blocks with the 4½” x 6½” neutral pieces, then assemble the quilt top in rows. Press the seams away from the pieced blocks, so that the rows ‘nest’ nicely when they're joined together.

13. Cut your backing into two WOF x 82” pieces, trim off the selvages and join together using a ½” seam, pressed open. Trim to 82” square.
14. Sandwich the batting between the backing and the quilt top, baste, then machine or hand quilt {and if you choose to hand quilt I'll be sharing my plans in Part 2. of the tutorial}.
15. Join your binding strips end to end to form one long strip and press in half, wrong sides together, along its length. Trim away excess batting and background - taking the opportunity to ensure your corners are square - and bind the raw edge using your preferred method {you can find my favourite method here}.
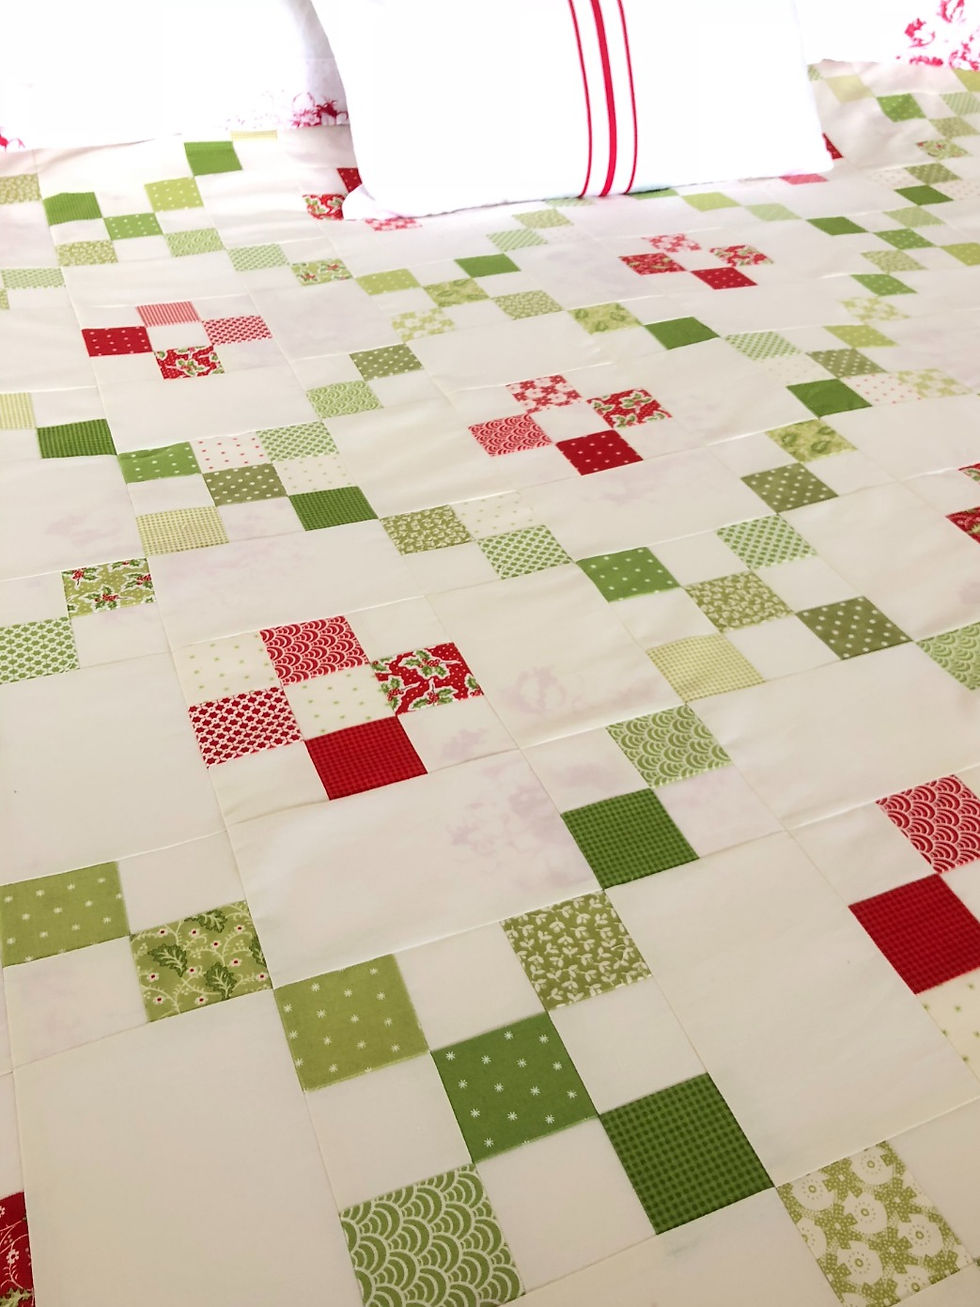
My pieced top ready for quilting and already looking quite at home
I hope that's inspired you to make a classic Irish Chain quilt. In Part Two I'll discuss how you can customise the design with different colour and background choices. I'll also share my quilting design with you and, hopefully, my progress so far...
{PS: You can download a PDF copy of the Wintersweet pattern here}
Nicola xx


